Because we’re in the business of fixing tile and stone problems, we get calls pretty much every day from folks who have issues with tile in wet areas like showers. Some problems we can fix, using regrouting, colorsealing or minor repairs.
But unfortunately, many times the problem was created the day the shower was built – incorrectly. The problems range from water leaks to cracked tile and grout, anywhere from an annoyance to a very expensive replacement.
Why listen to us on this?
For many years we used to build showers, installing stone and tile with 4 crews working all over Eastern Massachusetts and Southern New Hampshire. So frequently when we see a tile cracked or a grout line crumbling, we know how easily that problem could have been avoided during the initial build.
And now we don’t offer any tile installation anymore, so we have no ‘dog in the fight’, so to speak. If we recommend you tear out your shower and build a new one, it’s because we believe it’s what you need, and we don’t make any money from that.
In the metro Boston area, there are some very talented tile installers who do beautiful work. But in some cases, they know how to cut and install beautifully but they aren’t as skilled in the surface prep work that needs to be done beforehand. So, their beautiful work may end up being ruined and must be prematurely replaced due to water damage and structural issues.
The average homeowner doesn’t know how to select a good tile installation contractor and even some general contractors aren’t sure if their tile subcontractor is doing the surface prep and installation technique that’s the best practice.
The purpose of this checklist is to hit the high points that can cause damage if done wrong. It’s not an all-encompassing list of every mistake one could make in building a shower. Just the most common ones that we see a lot.
The checklist is not designed to harass the contractor at every turn by analyzing every box of screws he brings on the jobsite. That could easily cause an unproductive temper flare up.
Instead, consider using the checklist before selecting a contractor. You could simply forward the checklist and ask his opinion on it. A minor disagreement or adjustment probably isn’t crucial, but if a tile contractor you’re considering disagrees with most of the list, you’d be better off saying goodbye before spending any of your hard earned on him.
Note that this list doesn’t address the more complicated stall shower construction, but some of the points are the same.
CHECKLIST FOR BUILDING TUB SHOWERS
1. Before demolition begins, implement dust control measures. All demolition generates dust, so proper containment is essential from the start.
2. Cover the tub drain opening with tape before demolition to prevent tile fragments from entering and potentially clogging the drainpipe.
3. Inspect the studs after removing the old tile and backerboard or during new construction. They should be straight, rigid and stable. Standard installations use 2×4 studs at 16 inches on centers with reinforced corners. Test by physically pushing on them to check for movement or ‘wiggle’. Loose studs can cause future tile and grout cracking. If studs are damaged, improperly spaced, or flexible, reinforce them with additional framing. Some tile contractors may complain that they don’t do carpentry but reinforcing them at this stage is worthwhile even if it causes problems with the tile contractor’s schedule.
4. Right after demolition is the ideal time for a plumber to change the valve and inspect the pipes. With no walls in the way, he can identify potential issues easier.
5. Use only cement board products for the backerboard layer. Regular drywall or “greenboard” without very good waterproofing are guaranteed to fail for wet areas. Even if some building standards allow drywall in a shower, the safer course is to keep it out of a shower. Various cement board brands are available – some include integrated waterproofing while others require separate waterproofing applications. Specifically, the Tile Council of North America allows for fiber cement backer board, foam core backer board, and cement backer board, all of which are fine. Unfortunately, they also allow for two backer boards that are somewhat water sensitive gypsum based boards. Because gypsum in showers has cost millions of dollars of property damage, we’ll take a pass on any gypsum based product when so many better alternatives exist.
6. Secure backerboard only with specialized screws recommended by the cement board manufacturer, not standard drywall screws. The heavier weight of cement board and tile demands stronger fasteners than those used for drywall. (But unfortunately, they are sold in big box stores right next to drywall screws).
7. Follow the manufacturer’s guidelines for screw quantity and spacing. At a minimum these should be followed, and a few extras won’t hurt.
8. While scoring and snapping cement board works for some products, many brands cut that way develop uneven, crumbly edges that create gaps between panels. Diamond blade cutting ensures clean, precise edges. For the crumbly types, if possible, cut cement board outdoors with a diamond blade grinder rather than scoring and snapping. Outdoors because of the dust created by dry grinding.
9. The least complicated way to determine shampoo niche locations is to base it on stud placement, which isn’t visible until demolition. That approach requires being flexible beforehand on exactly where the niche will be placed. Access to a good carpenter, though, can enable you to plan to rearrange the framing if you have your heart set on a location that won’t currently fit. Not all tile contractors are comfortable doing that level of carpentry, so you may need another person to handle that.
10. There is more than one way the contractor can hang the cement board. One common approach is to hang it so its bottom edge sits slightly above the tub’s surface, in front of the tub flange (the raised lip on three sides of most porcelain tubs). Achieve this by temporarily placing shims between the tub and cement board during installation. This prevents wicking of water into the cement board. For Jacuzzi-style tubs without flanges, you need to rely on properly applied caulk between tub and tile and keep that joint in good condition, since it’s the ‘last line of defense’ against water leaks.
11. Join cement board panels with seams reinforced with alkaline-resistant cement board tape embedded in thinset mortar. Do not use standard drywall tape, which deteriorates in alkaline environments, like thinset mortar. And, of course, drywall tape is right next to the correct board tape in big box stores, so installers could choose the wrong product by mistake. Rapid setting thinset mortar is acceptable for this application to reduce waiting time. See photo below of cracks developed by doing this step wrong.

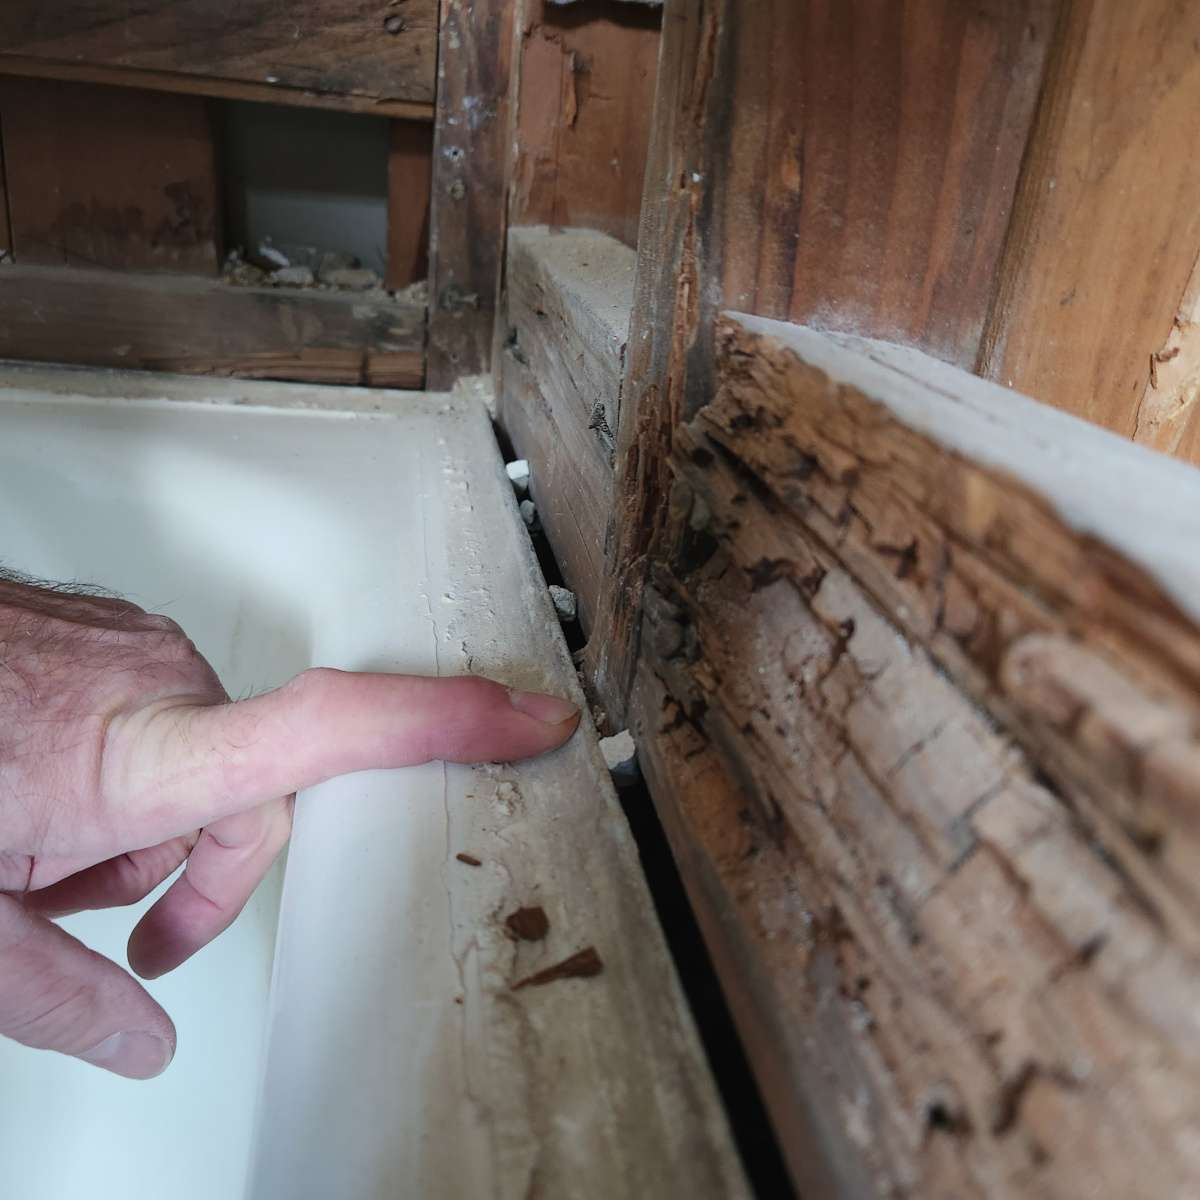
12. Waterproof the cement board before tiling since grout is not waterproof. So even if grout is properly applied, water absolutely will seep through the grout to the cement board. While cement board doesn’t deteriorate when wet, it allows water to reach the studs, potentially causing damage. Either use the newer version of pre-waterproofed cement board or use uncoated regular cement board and apply a waterproofing membrane. Many contractors skip this crucial step, but waterproofing systems are relatively inexpensive (under $60 for a standard shower in 2025) and quick to apply (15 minutes application, 1 hour drying, 2 hours if you want a second coat) Some products change color when dry, indicating when tiling can begin. The extra hour or two and the minor expense are cheap insurance against expensive leaks. You can get a decent idea of what it looks like are on this gentleman’s website: https://homerepairtutor.com/waterproof-bathtub-walls/ The photo below shows water damaged wood studs and supports from a shower with no waterproofing at all. Not pretty.
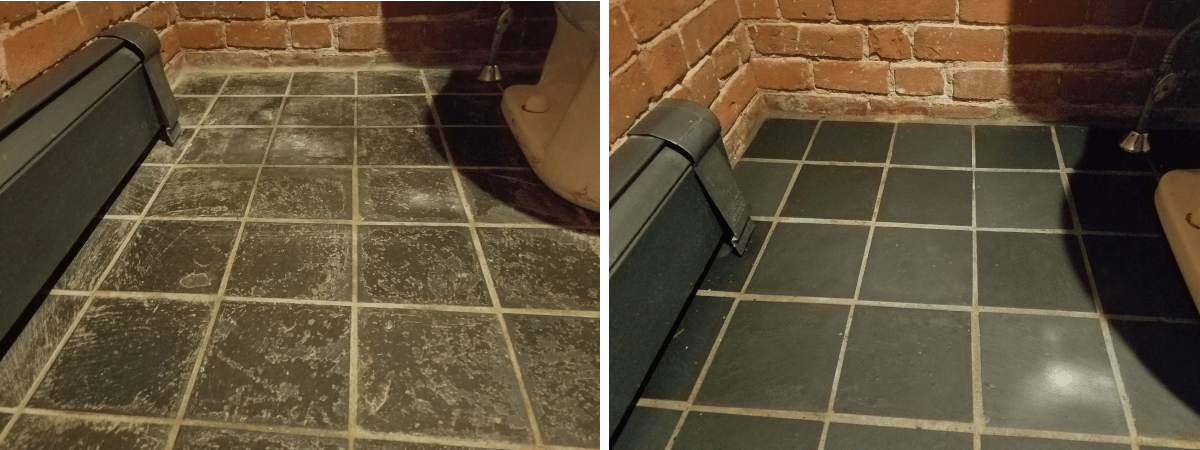
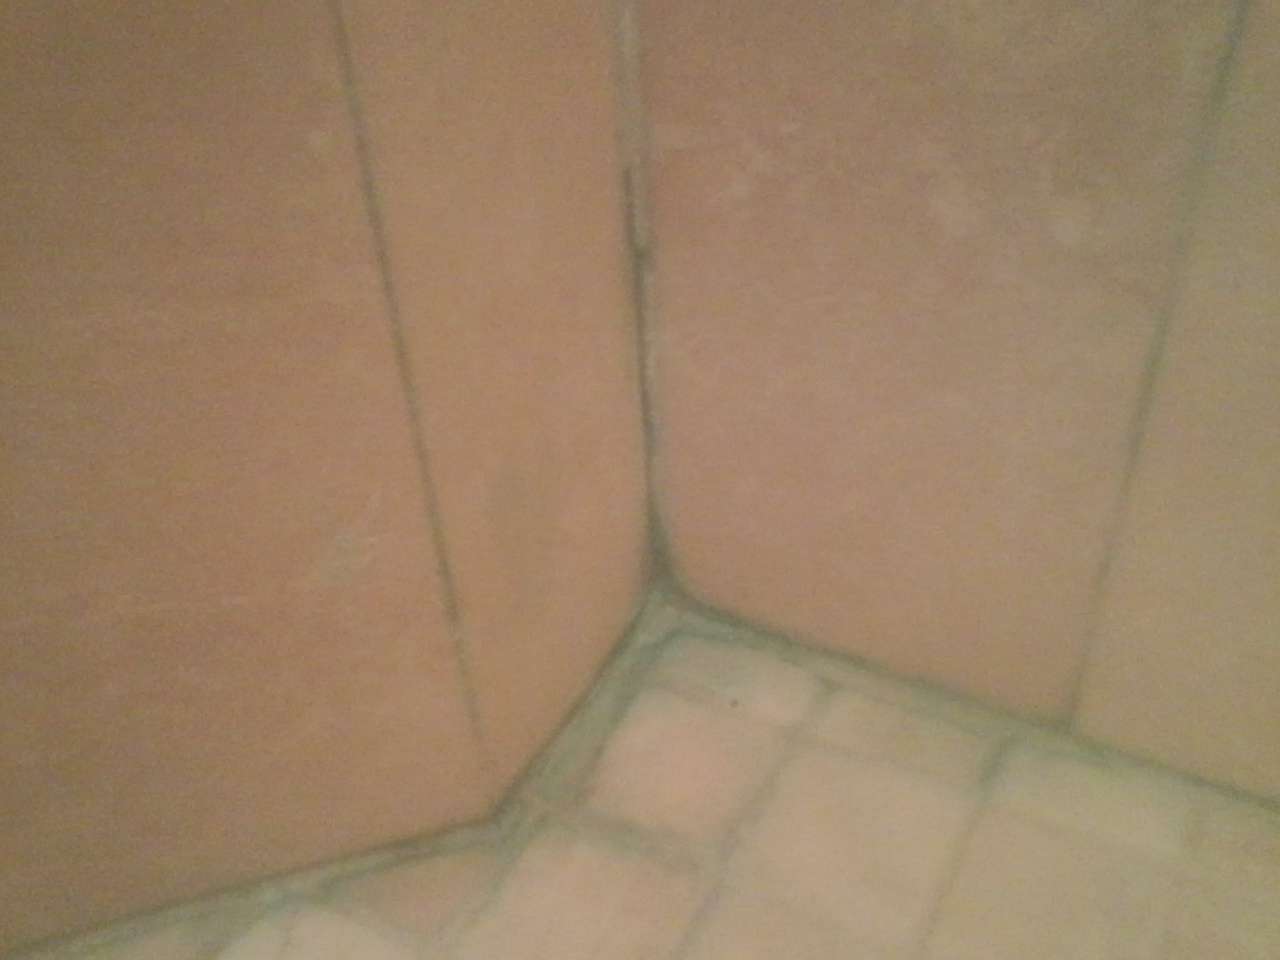
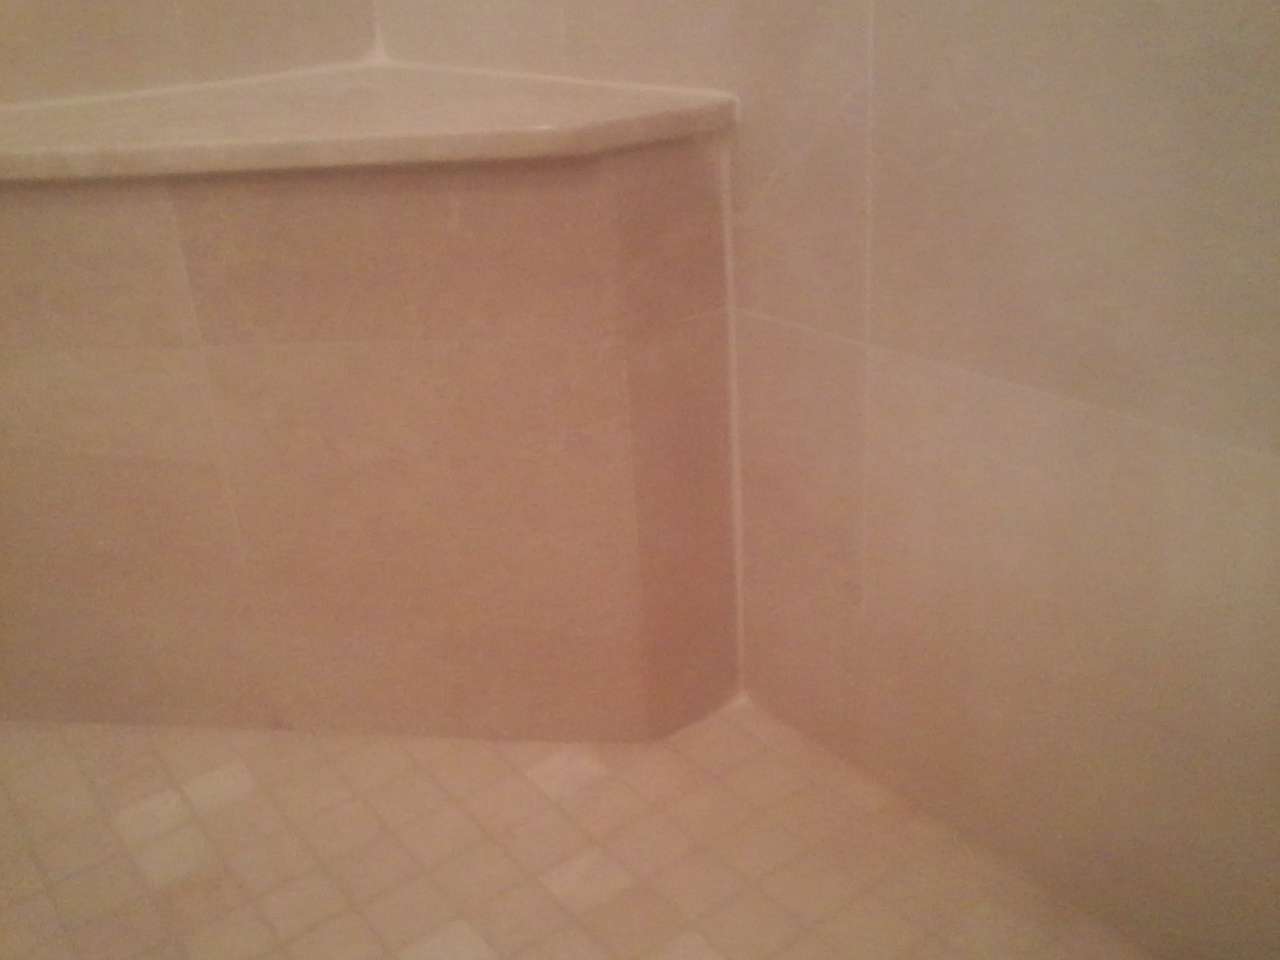
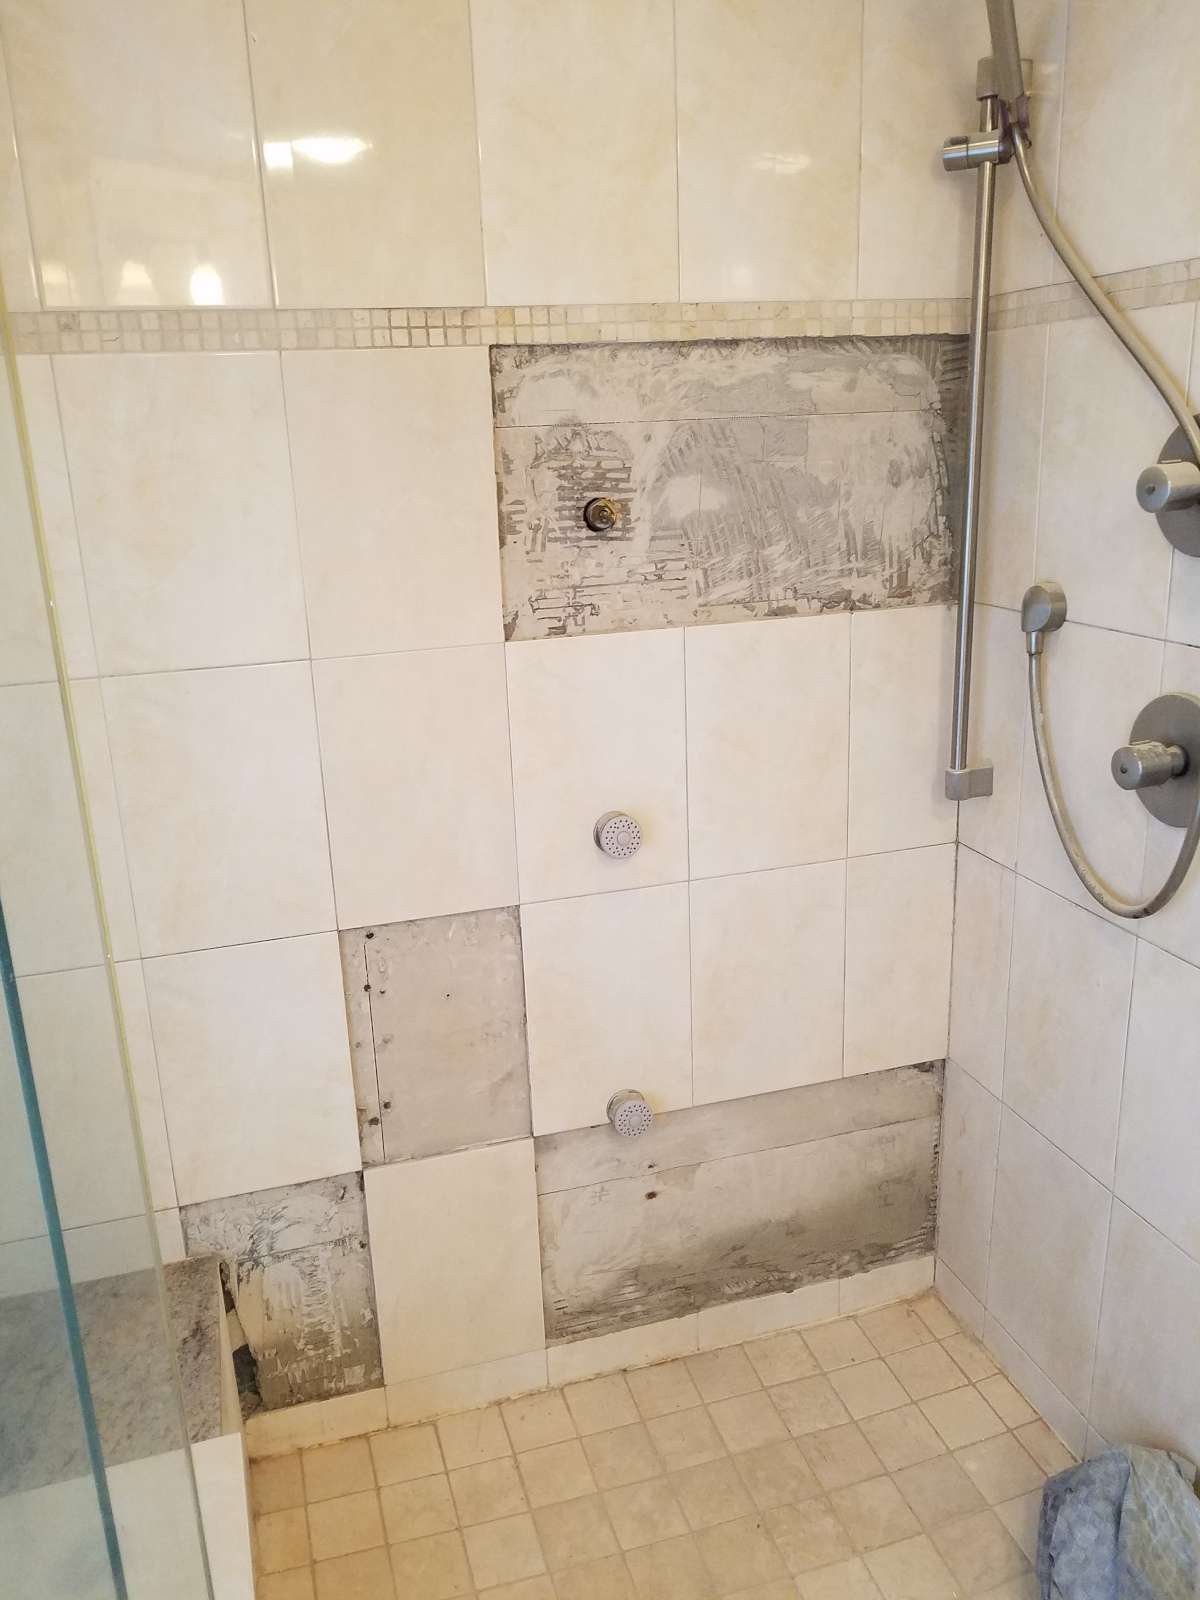
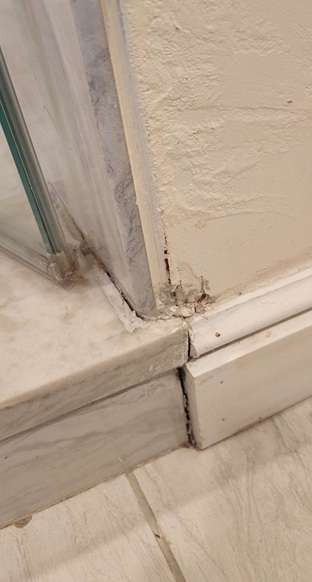
13. It’s also possible to waterproof behind the cement board. While it may be effective in keeping water away from the wooden or metal studs, we find this approach less than optimal because the cement board itself is not waterproofed in front. That means it can absorb water and become soaked over time. That can lead to water from the board wicking into nearby drywall just outside the shower. Notice in the first photo below how the lower part of the cement board, exposed during a repair job we did, is darker because it’s absorbed so much water. Notice the second photo of what drywall damage looks like, most likely caused by wicking action.
14. For tile installation, use only properly mixed thinset mortar—never ‘premixed thinset’ or mastic in wet areas, even if some building standards allow them. Contractors should mix powder with water on-site. Insist on proper thinset mortar even if the contractor suggests mastic, which almost always leads to eventual failure in showers. Show him the door if he does not use real thinset mortar. Manufacturers out there may have developed a premixed product that can stand up to water exposure, but we’ve seen so many failures caused this way that we just avoid that product category altogether.
15. Select high-quality thinset mortar. Better grades provide stronger bonds and greater durability. Lower-priced options typically indicate inferior quality. Given the investment in shower installation, using premium thinset is always worthwhile.
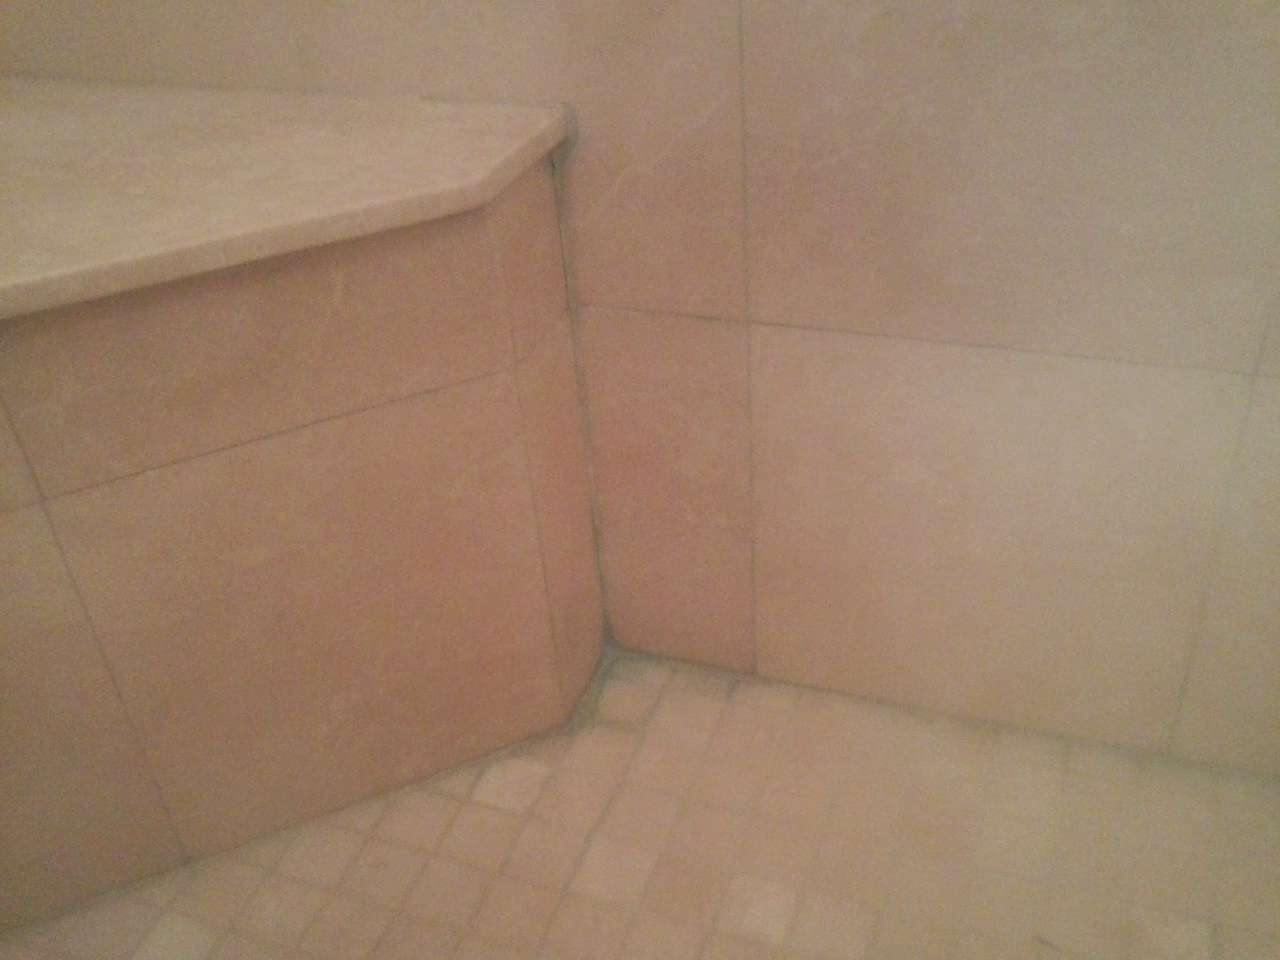
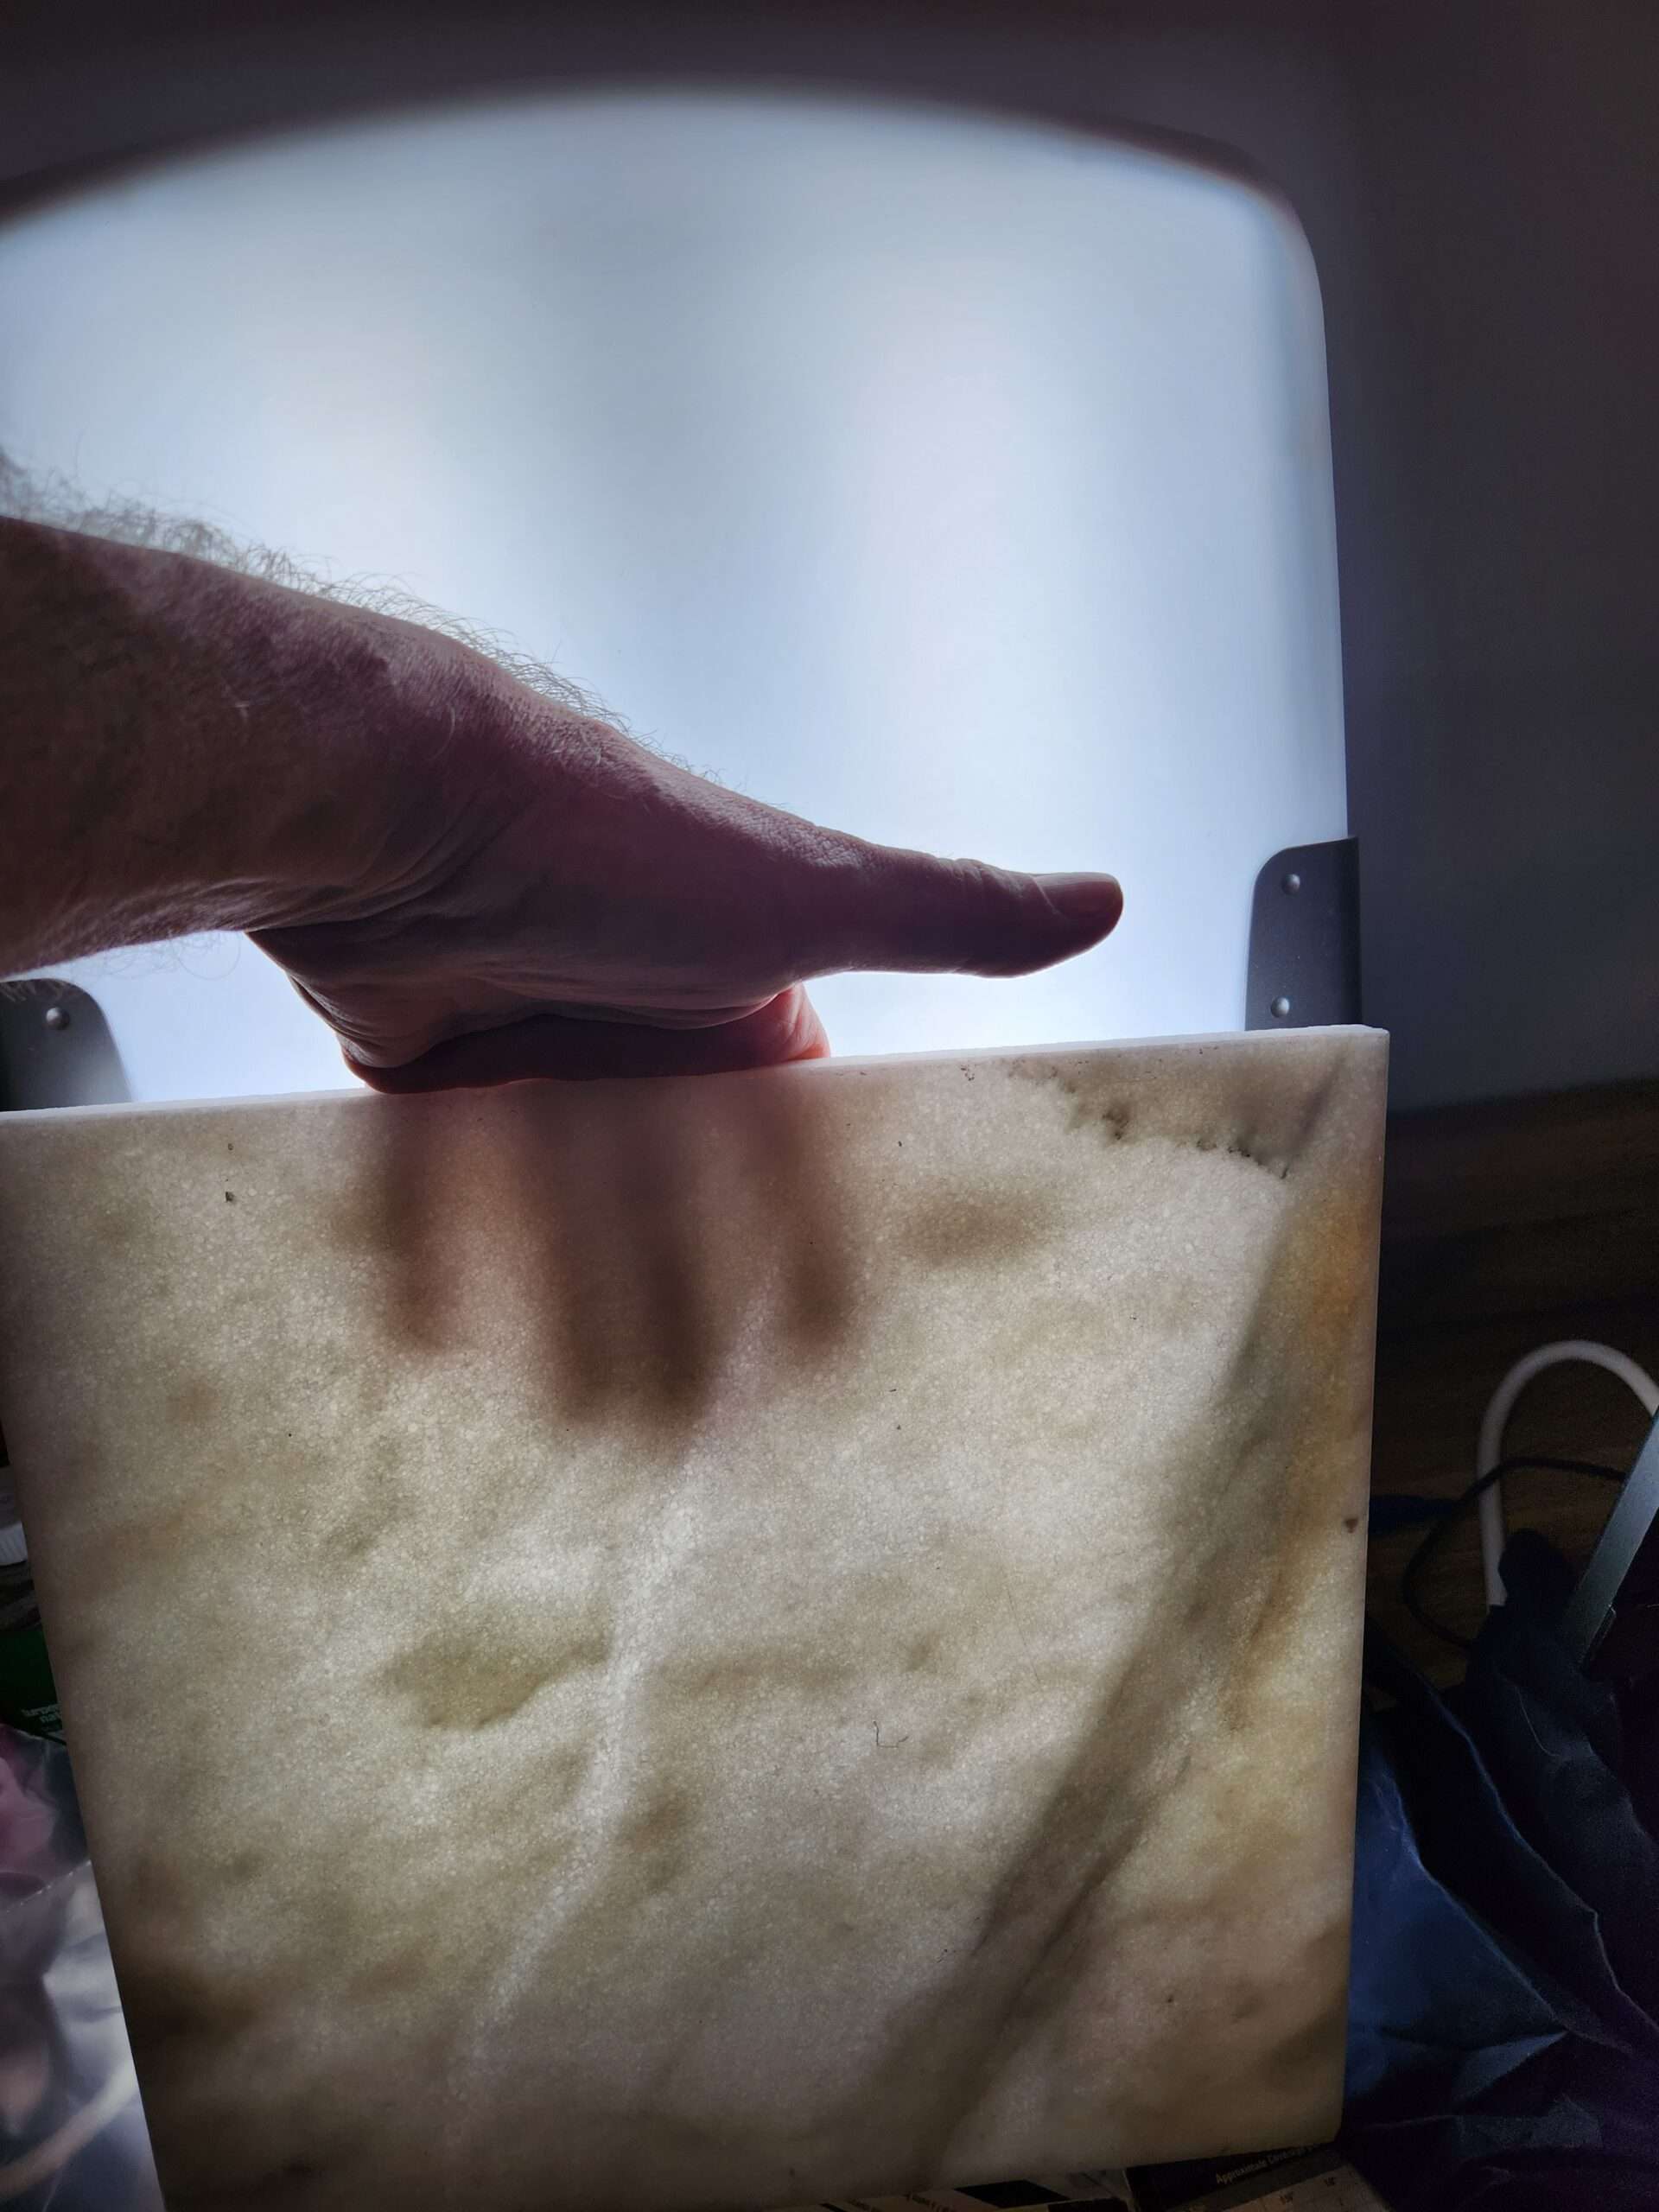
16. Thinset mortar comes in two colors – white and gray. Your contractor should default to white, especially with natural stone installation. Many stones are somewhat translucent and porous and using dark thinset behind a white marble tile, for example, may cause pigment to seep inside the stone and create a darker look that can’t be eliminated. (see photo). The only time dark gray thinset could possibly make sense is if the planned grout color is also dark gray and the tile is not translucent.
17. Support tiles during installation because thinset doesn’t create an immediate bond like mastic. Begin tiling at the bottom and work upward. One way to do this is to install a temporary “batten board” at the second row’s starting height, perfectly level, to support tiles while the thinset cures. Remove it after the upper tiles set, then install the first row.
18. Plan tile layout carefully before installation. While there are many attractive pattern options, avoid simply starting with full tiles without considering where the row ends. Properly balanced layouts have equal-sized cut tiles on both sides of each wall. Whenever possible, avoid tiles cut smaller than half-size, as numerous small cuts indicate poor planning and workmanship. This last rule is not always feasible with some mosaics and certain unusually shaped tiles.
19. Determine grout line width during planning. Traditional installations use narrow joints with unsanded grout for smaller tiles and natural stone, while larger or irregularly shaped or unevenly sized tiles require wider joints with sanded grout.
20. Match trowel notch size to tile dimensions. Select appropriate trowels based on tile sizes – small notches for mosaics and larger notches for large-format tiles. The trowel determines thinset thickness and coverage, which varies by tile size. Aim for full coverage or at least 95% coverage with the mortar, avoiding techniques like 4 spot or 5 spot bonding. Back buttering the tile does take extra time, but we are aiming for a quality job here
21. Select grout color and type before installation begins. Traditionally, narrow joints use unsanded grout while wider joints require sanded grout. Modern fine grained sanded grouts can now work in somewhat narrower joints than previously possible.
22. Mix grout powder with the correct amount of water to achieve a peanut butter or cake batter consistency. Avoid overly wet “soupy” mixtures, which lead to weak grout prone to premature failure.
23. Contractors should minimize grout haze during installation and clean thoroughly afterward. Removing excess grout haze is the installer’s responsibility, not the client’s.
24. If there is an excessive amount of grout haze on the surface of the tile and it’s not an acid sensitive stone like marble, limestone, travertine or onyx, there are commercially available grout haze removers or a mixture of 50% water and 50% clear vinegar will also work. Apply the solution, let it sit briefly, scrub with a nylon pad, and dry thoroughly. For built-up grout on tile faces, carefully scrape with a razor blade without scratching the tile surface. Note that some manufacturers recommend waiting 10 days for grout to cure more before using acidic chemicals.
25. For grout haze on acid sensitive natural stone such as marble, limestone, onyx or travertine, do not use acid to remove grout haze. It may be wise to contact a stone restoration contractor (like our company, for instance). Acid can instantly cause expensive damage to these stones.
26. Apply clear penetrating sealer to grout lines after 72 hours of curing time. Spray or brush the sealer onto grout lines, allow it to penetrate, then thoroughly wipe dry to prevent residue formation. Horizontal surfaces are easier to seal than vertical ones, where runoff wastes product. The critical step is thoroughly wiping it dry – expect to use 2-3 rolls of paper towels for an average shower. Most coatings and sealers like acrylics are applied and then allowed to dry on the surface. Penetrating sealers aren’t meant to dry on the surface of the tile like that. If they do, it creates an ugly crust that can be hard to remove. So the amount of wiping needed is what beginners (and inexperienced contractors) often underestimate.
27. Consider sealing grout even when manufacturers claim it’s unnecessary. While some modern grouts may not require sealing, applying clear penetrating sealer provides additional protection at minimal cost and extends the shower’s maintainable lifespan.
28. If you plan to have a glass company custom fit a glass shower door and other panels, they really need to wait until the tilework is complete before measuring for the new glass. The reason is that each panel is templated to the exact proportions of the shower as built. Some folks ask them to come out earlier, thinking it will speed up the process. It won’t – it will just annoy them. They won’t cut glass until they have final measurements.
Feel free to download this list and forward it to anyone you want. We’d appreciate an acknowledgement as the source…